

How To Remove And Replace Interior Window Trim
Window sills are quite prone to damage from pets, plants, and weather over time. Repairing or replacing former window sills is an easy home repair project that only takes a few hours and basic tools.

We love our homes, but they aren't impervious. Cruddy cracks, dings, and everyday damage can build upward over time and window sills are quite decumbent to damage from pets, plants, and weather. A interior window sill is the bottom portion of the window, and usually has a lip that overhangs the trim molding.
In today's tutorial, I am showing how to supplant interior window sills from some of the virtually common problems:
- Rot
- Water Damage
- Bubbling MDF or pressboard
- Pet damage and deep claw marks
Repairing trim is actually practical, economical, easy to install, and only takes, at most, a few hours!
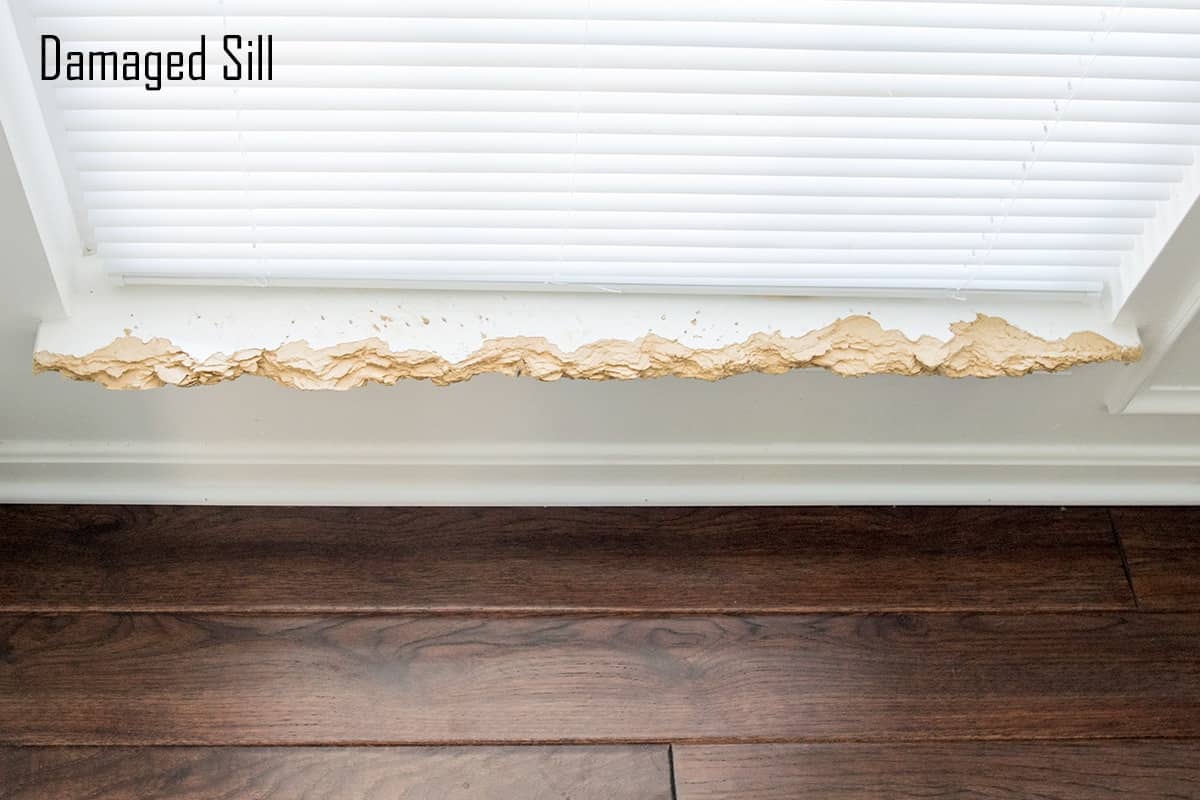
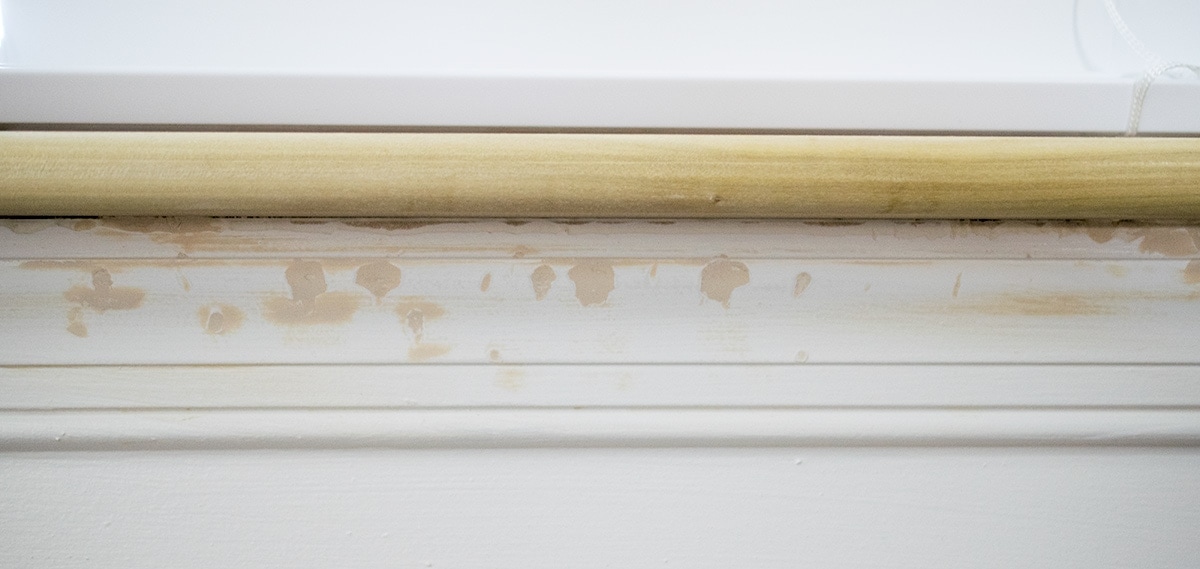
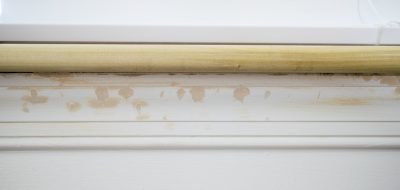
So, first, nosotros have the crime. There's actually iii of these that look this bad. This harm is all from a wonderful pup we rescued. Unfortunately, he had severe separation feet, but it seems to have calmed down after a year of working with him. So it's time to say good day to this eyesore!
Tools and Materials
- Hammer or prybar
- Utility Pocketknife
- Hand Saw or Jig Saw
- Nails or Brad Nailer (This is the top rated kit we apply)
- A board and router or a millwork board to match the other sills in your home
- A product to stop rot (you may or may not need this merely we have used this one in the by)
- Wood Filler
- Putty knife
- Level
- Trim Caulk
Removing Window Casing and Sill
The start step is always the near worrisome, right? The window itself isn't actually attached to the interior sill. The sill should be installed into the framing.
Step i: Remove any side casing
Casing is trim that is around the outsides of doors and windows. Not all windows have casing, as our was just continued to drywall and caulked to hide seams. You will likely take to remove this considering the casing sits on acme of the sill, preventing the sill from moving upward.
The photos below are of me removing door casing, but nonetheless steps utilise.

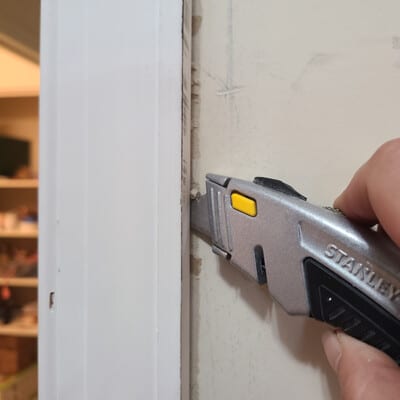
To remove casing, cut the caulk line on both sides that hides the drywall and window framing seal. Drag a razor knife top to lesser to do this, making sure to get the full caulk line if yous can. Cutting any caulk around the sill as well. (photo 1)
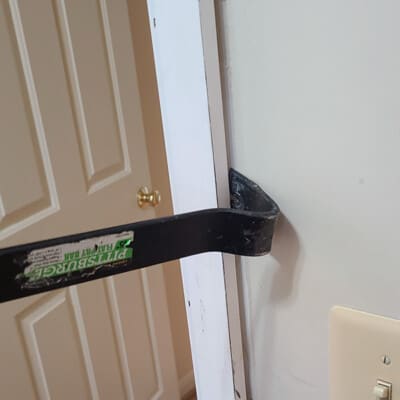
I use a crowbar to pull out the casing from the drywall. If prying, brand sure use a brace against the wall so you don't paring the drywall. (photo 2) Cleanup the backlog caulk and remove nails/staples. (photo three & 4)
Often times the casing can be salvaged and put dorsum on if yous are conscientious, but sometimes it needs replaced.
Step two: Pry off the sill.
Use a prybar or chisel to slowly pry the sill up. A hammer besides helps. Keep the sill in one piece so you tin use it as a model when cutting the new sill. So gear up it aside for later.
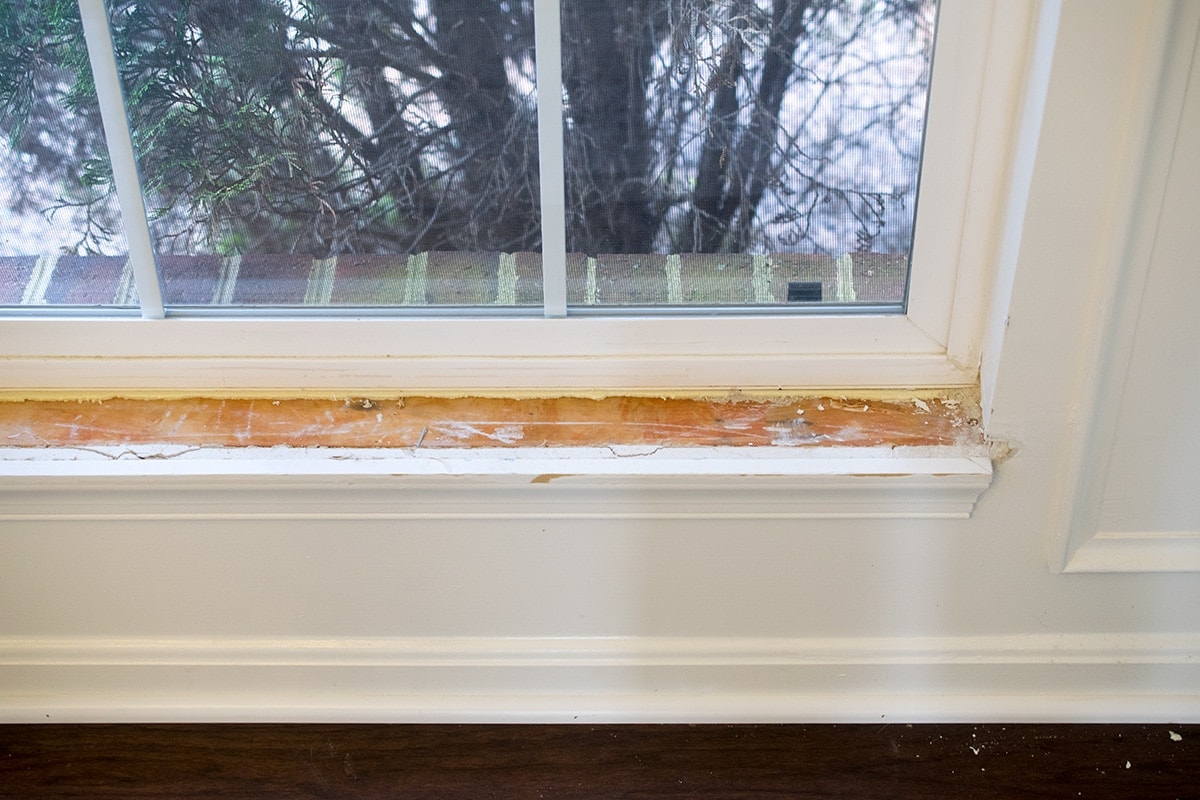
Dealing with Rot
At this stage, the biggest thing to watch for is any rot that may exist around the frame. Rot will need to be removed, or it will go along to spread. If yous practise find minor mold or rotted wood, replace or clean and use a product similar this to stop rotting.
Rot needs two things to happen: a illness inducing bacteria or fungus and water. Brand sure that you are fixing the source of the water that acquired the rot.
If you find major rot (structural or the h2o source can't be establish), here is where I recommend seeking professional assistance as the window and framing may need to be replaced.
After solving those issues, if whatever, here is a great opportunity to fill whatsoever gaps if they be to ensure a more air tight seal. Take window spray foam and spray into the gaps and allow to dry. Cut away the backlog foam with a razor blade prior to installing the new sill.
Step 3: Cutting The New Sill
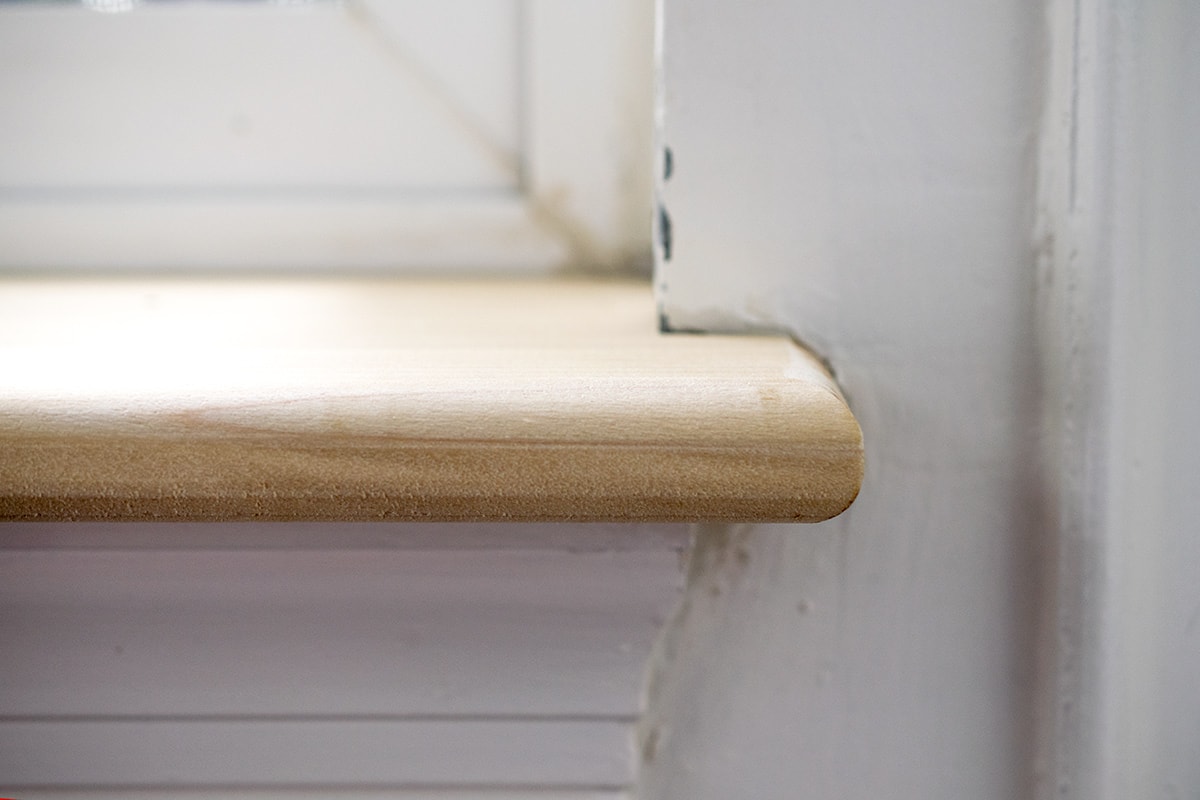
We made our own here. A simple encounter the router to create a bullnose border makes whatever advisable board a proper sill. If yous practise not have a router, almost window sill material tin be found in the millwork section at a dwelling improvement store like Home Depot. Hither is an example similar to ours. You lot will demand to cutting it to size however. Marker the board using your template from previous sill and cut.
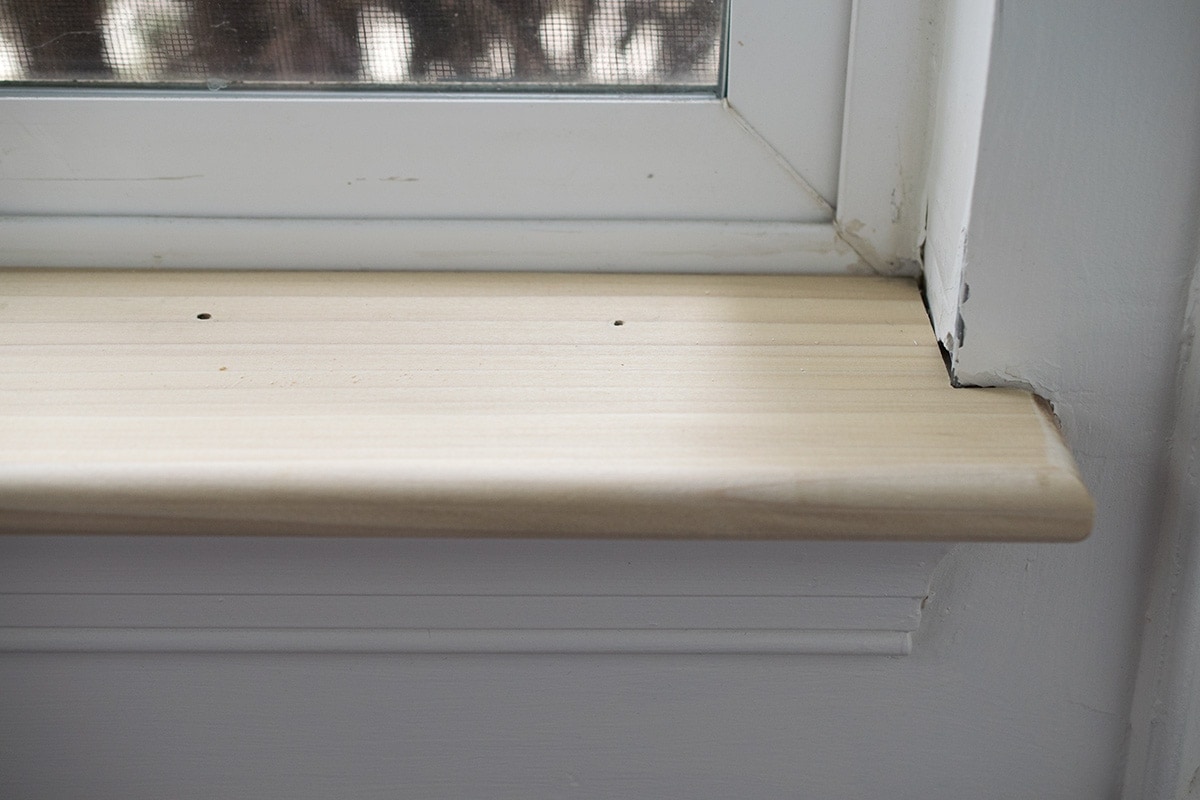
Step 4: Attach new sill
Use nails or brad nails to install the forest board into identify ensuring to blast into the framing below. I do not recommend gluing as it isn't needed and volition make any future repairs more than hard.
Step 5: Add Window Trim
If yous had casing to remove around the window here is when yous can reattached around the window.
Step half dozen: Final Touches
This is both the easiest and longest step for professional results. Depending on your particular situation, you may need to:
- Make full and smooth all smash holes with wood filler in wood areas.
- patch whatever dings in the drywall.
- Caulk around the edges of all the window trim and frame.
- Prime and paint as needed to match the existing trim in the firm.
In our instance, the window trim under the sill had some gouges and dog chewing damage besides. I elected to fill this particular slice every bit the edge cuts are not piece of cake.
Expert Tips
- I have used a lot of woods filler and this is my favorite production. I thinned information technology out with a flake of water to get in the smaller areas.
- For filling this type of wood, I love these sponges considering they have edges that I can easily control and get into the ridges.
- Try to discover existent wood products rather than the cardboard-like pressboard that new houses utilize. It is a much amend product that is easier to piece of work with and is less prone to damage and problems.
- If you would like more information on caulking, check out our step-by-step guide to Caulking baseboards.
LOOKING FOR MORE SIMPLE WAYS TO IMPROVE YOUR Dwelling?
- The Easiest Mode to Make Baseboards look Beautiful Again
- Make Basic Cabinets Look Expensive with Trim
- Edifice A Custom Closet
- How to Paint Old Kitchen Cabinets
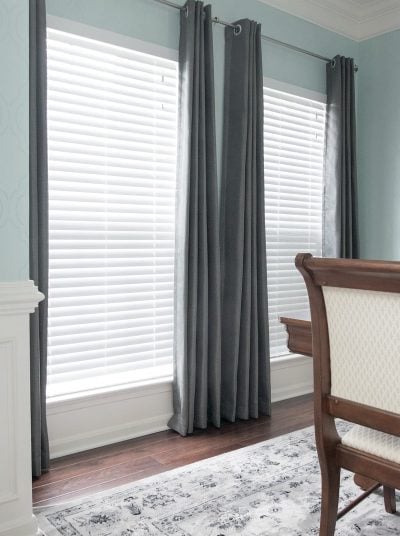
Well, now that'southward over, the dining room makeover will look much more than finished. It's hard to make a room inviting, cozy, and cute with eye sores such as these. If you want to come across our finished dining room makeover, bank check out our dwelling tour tab with all of our before and after makeovers.
Often Asked Questions
How do you fix peeling pigment on a window sill?
Scrape off any peeling paint. Use a pigment stripper or sand with 120 grit sandpaper until smooth. Vacuum and wipe all dust off, and then pigment with 2 coats of durable paint.
Why do window sills rot?
Rot needs two things to happen: a disease inducing bacteria or fungus and water. Although sloped, a windowsill is a horizontal shelf where h2o can accumulate. The first step to repairing rot is to remove whatever exposure to the source of water.
What finish is all-time for window sills?
A highly durable paint or poly topcoat is essential for protecting a windowsill. Cheap paint often becomes gummy and items fix on it can stick. Use a satin or semi-gloss paint that is UV resistant.
How much does it cost to replace a window sill?
Whether interior or exterior, materials price less than $l for woods window sills. If you have to hire a contractor, expect to pay additional labor charges of $100-250. Both calculations assume there isn't more extensive damage to the window or framing, which would increase costs.

Sign upward below to receive updates including free printables, organisation tips, domicile improvement projects, recipes and more!
More Trim Tutorials
-

Adding Trim to an Island -

Beautiful Baseboards -

How To Caulk A Bathtub -

Update Your Cabinets
PS I dear seeing your creations! Exist sure to have a photo and tag#cravingcreative on Instagram! You can besidesstay in affect with me through following me on Instagram, Pinterest, and Subscribing to the Newsletter!

-
Paw Saw or Jig Saw
- 1 Window Sill Board cut to length
- Wood Filler
- Nails 2 inch finishing nails or brad nails
- Trim Caulk
- Paint
- Drywall spackle
-
Cutting the caulk line effectually both sides of the casing and the window sill itself. Elevate a razor knife superlative to bottom to practice this, making sure to get the full caulk line if y'all can.
-
Apply a crowbar to pull out the casing from the drywall. If prying, brand sure to use a brace against the wall so yous don't paring the drywall.
-
Utilize a prybar or chisel to slowly pry the sill up. A hammer as well helps. Try to continue the sill in ane piece so yous can use it as a model when cutting the new sill.

-
Measure the sill expanse and utilise the old sill as a template if possible. Cut the new sill to size. Dry fit several times as the walls is likely non be completely straight.

-
Utilize nails or brad nails to install the wood board into place ensuring that information technology is nailed into the framing below.

-
Reattach or supercede the side casing and trim that was removed with nails or brad nails.
-
Complete the finishing of the window. Make full and smooth all nail holes with forest filler and patch walls if necessary. Caulk around the edges of all the window trim and frame. Prime and paint equally needed to match the existing trim in the firm.
General Tips

How To Remove And Replace Interior Window Trim,
Source: https://www.cravingsomecreativity.com/replace-interior-window-sill-trim/
Posted by: mckissackfrien1940.blogspot.com
0 Response to "How To Remove And Replace Interior Window Trim"
Post a Comment